Onboarding a Workspace
Not included in DVARA Open Source.
This is the end-to-end flow for bringing a new workspace online. It starts with a platform owner and ends with a workspace admin who can manage the workspace without platform-wide access. The whole flow happens in Flightdeck.
This guide assumes built-in email/password authentication (the default). The OIDC and SAML modes are slightly different and covered at the end.
owner creates the workspace → owner invites the workspace admin → admin accepts the email invitation → signs in → lands on the workspace home page → invites the rest of their team.
Prerequisites
- A platform owner account signed in to the Flightdeck. If this is your first time, run through First-run setup to create the initial owner.
- The six built-in roles and their capabilities are documented in Setup & Login → RBAC roles. This guide uses
owner(platform) andadmin(workspace). - For production, email delivery needs to be configured — see Email delivery below.
Step 1 — Create the workspace
In the sidebar, open Access → Workspaces and click New Workspace. Fill in the basics (name, status, priority tier, and any workspace rate limits), then submit.
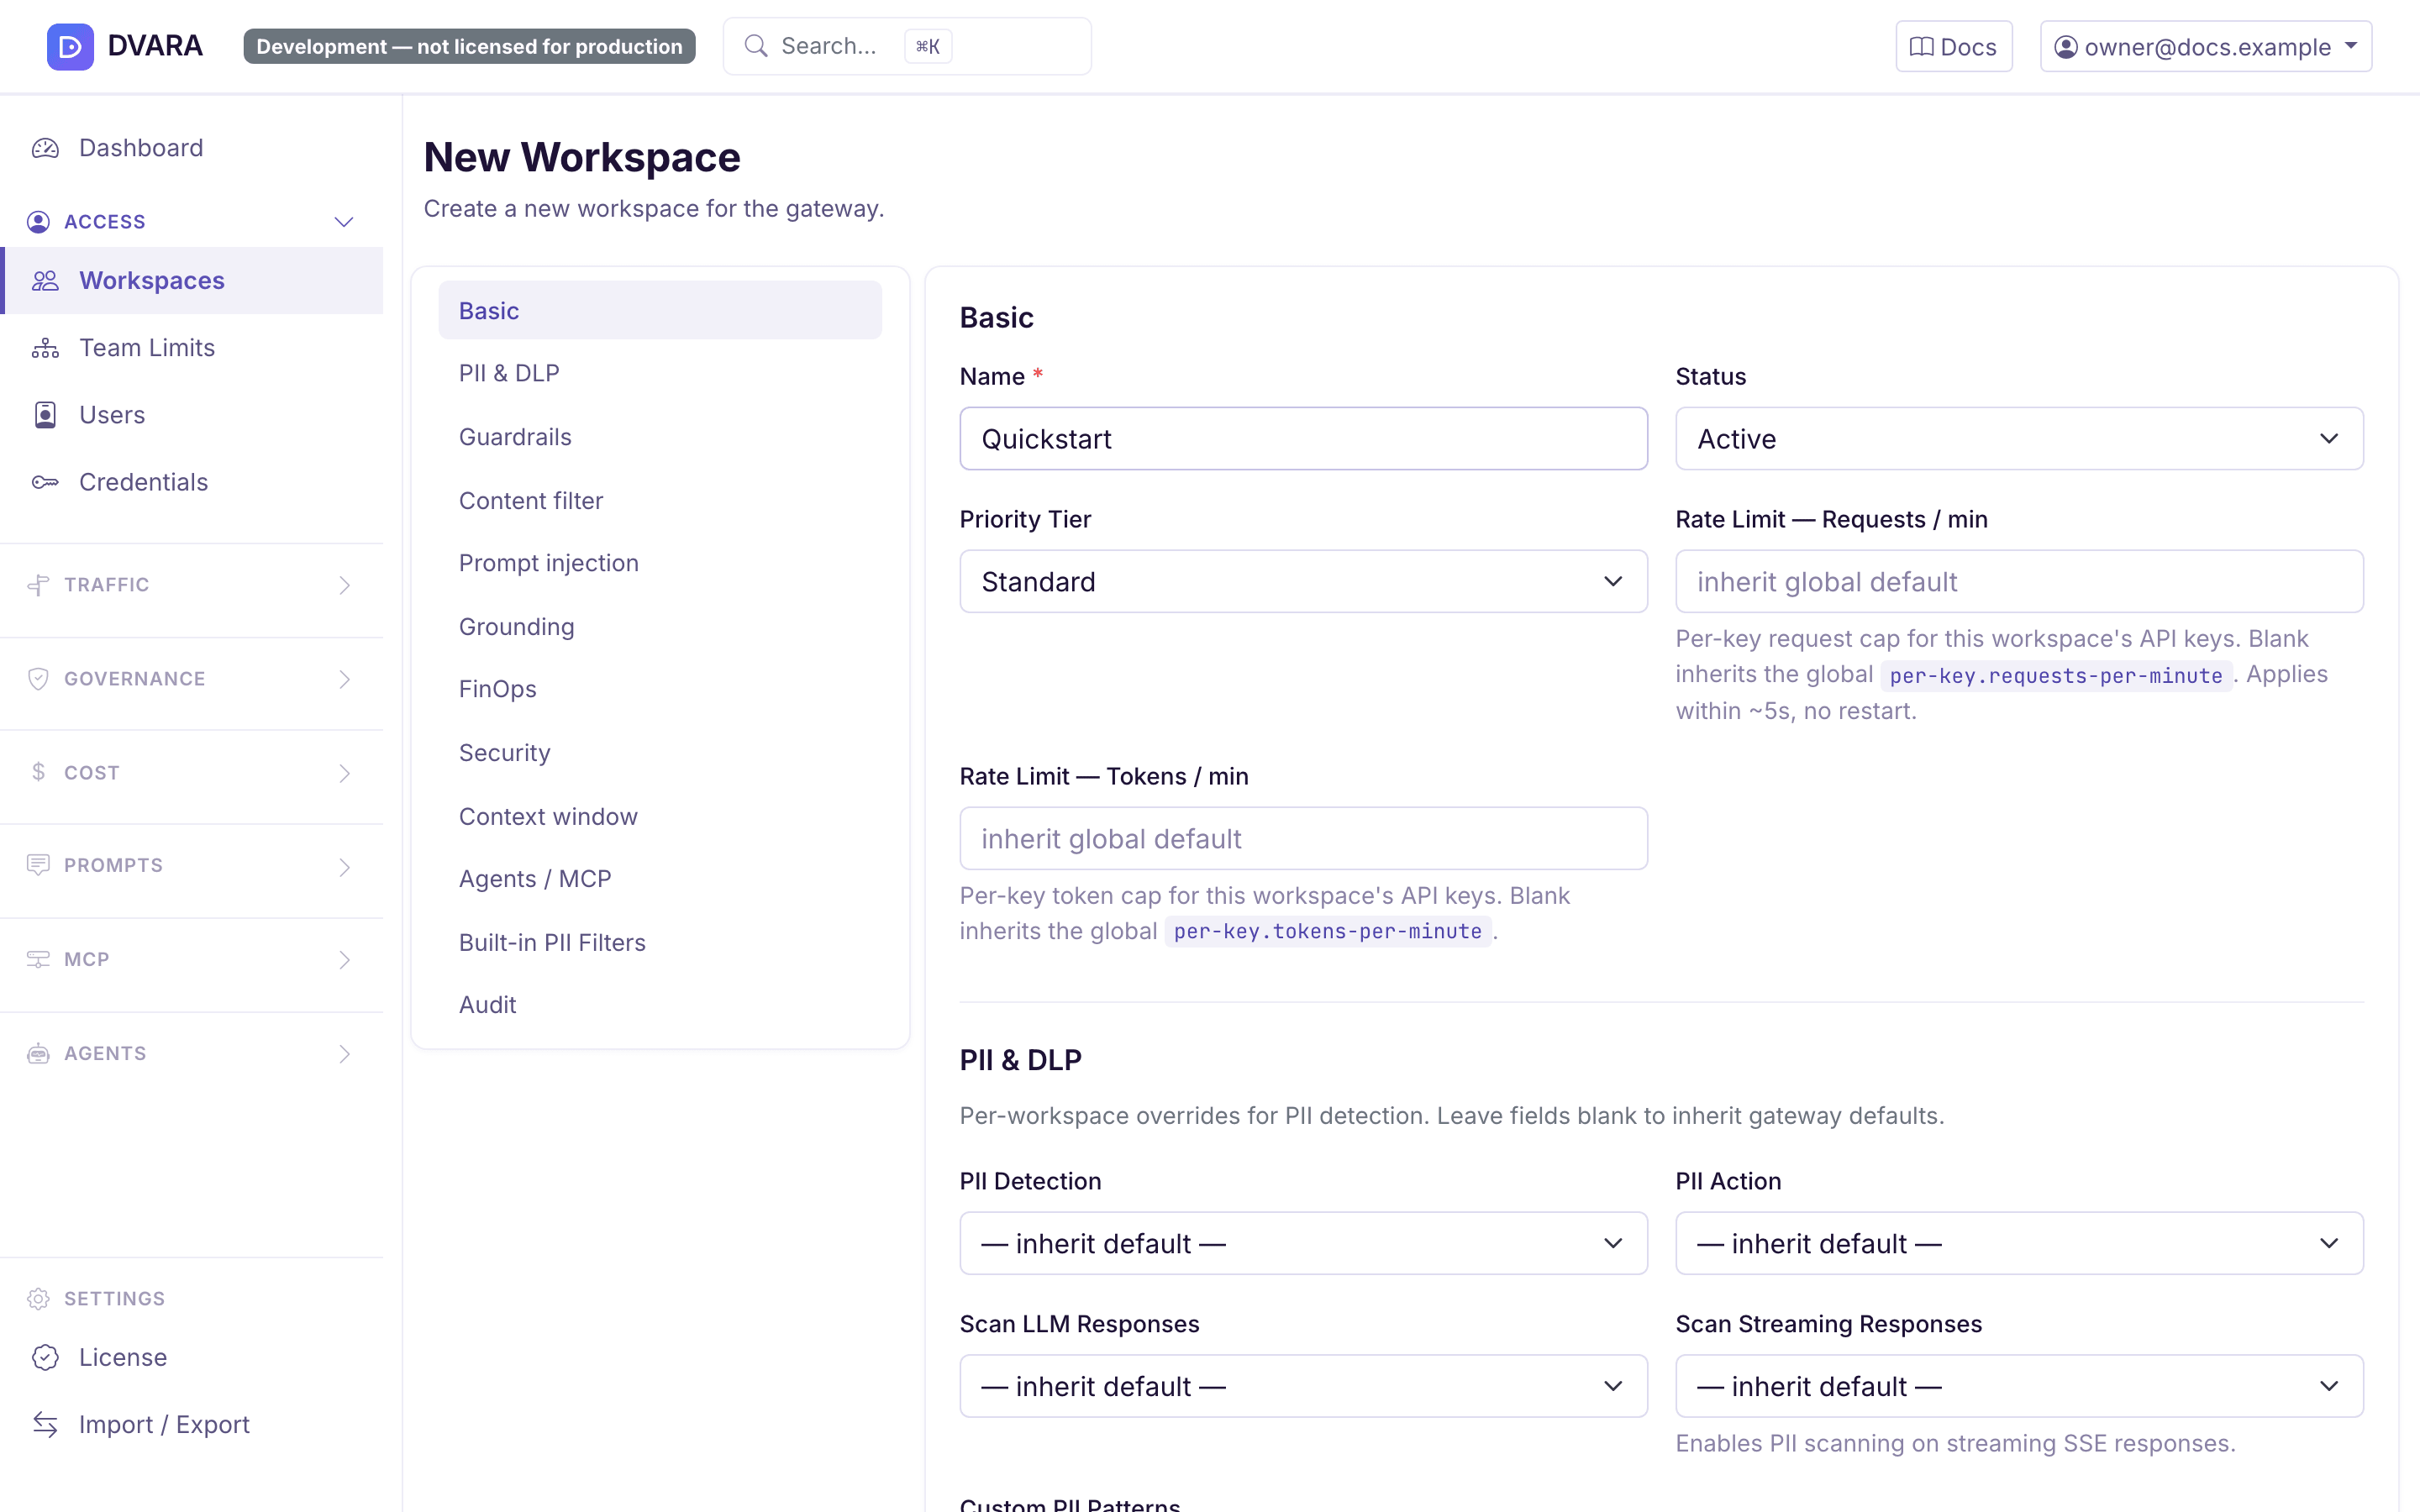
When the save succeeds, a toast appears at the top-right with a call-to-action link:
✅ Workspace 'Acme Corp' created. Invite admin →
The toast stays up for seven seconds. Click Invite admin → while it's still visible and you'll be dropped on the invite form with the right context already filled in. If you miss it, the same deep link is available from the workspace's edit page (next step).
A WORKSPACE_CREATED event lands in the audit log at this point; see it under Audit → Events.
Step 2 — Review the Team section (optional)
Open any existing workspace's edit page (Workspaces → Edit on the row). A new Team section in the sidebar lists users assigned to this workspace plus two deep-link buttons:
- Invite admin — pre-selects the workspace role
admin - Invite with other role… — opens the invite form with just the workspace ID pre-filled so you can pick
developerorviewermanually
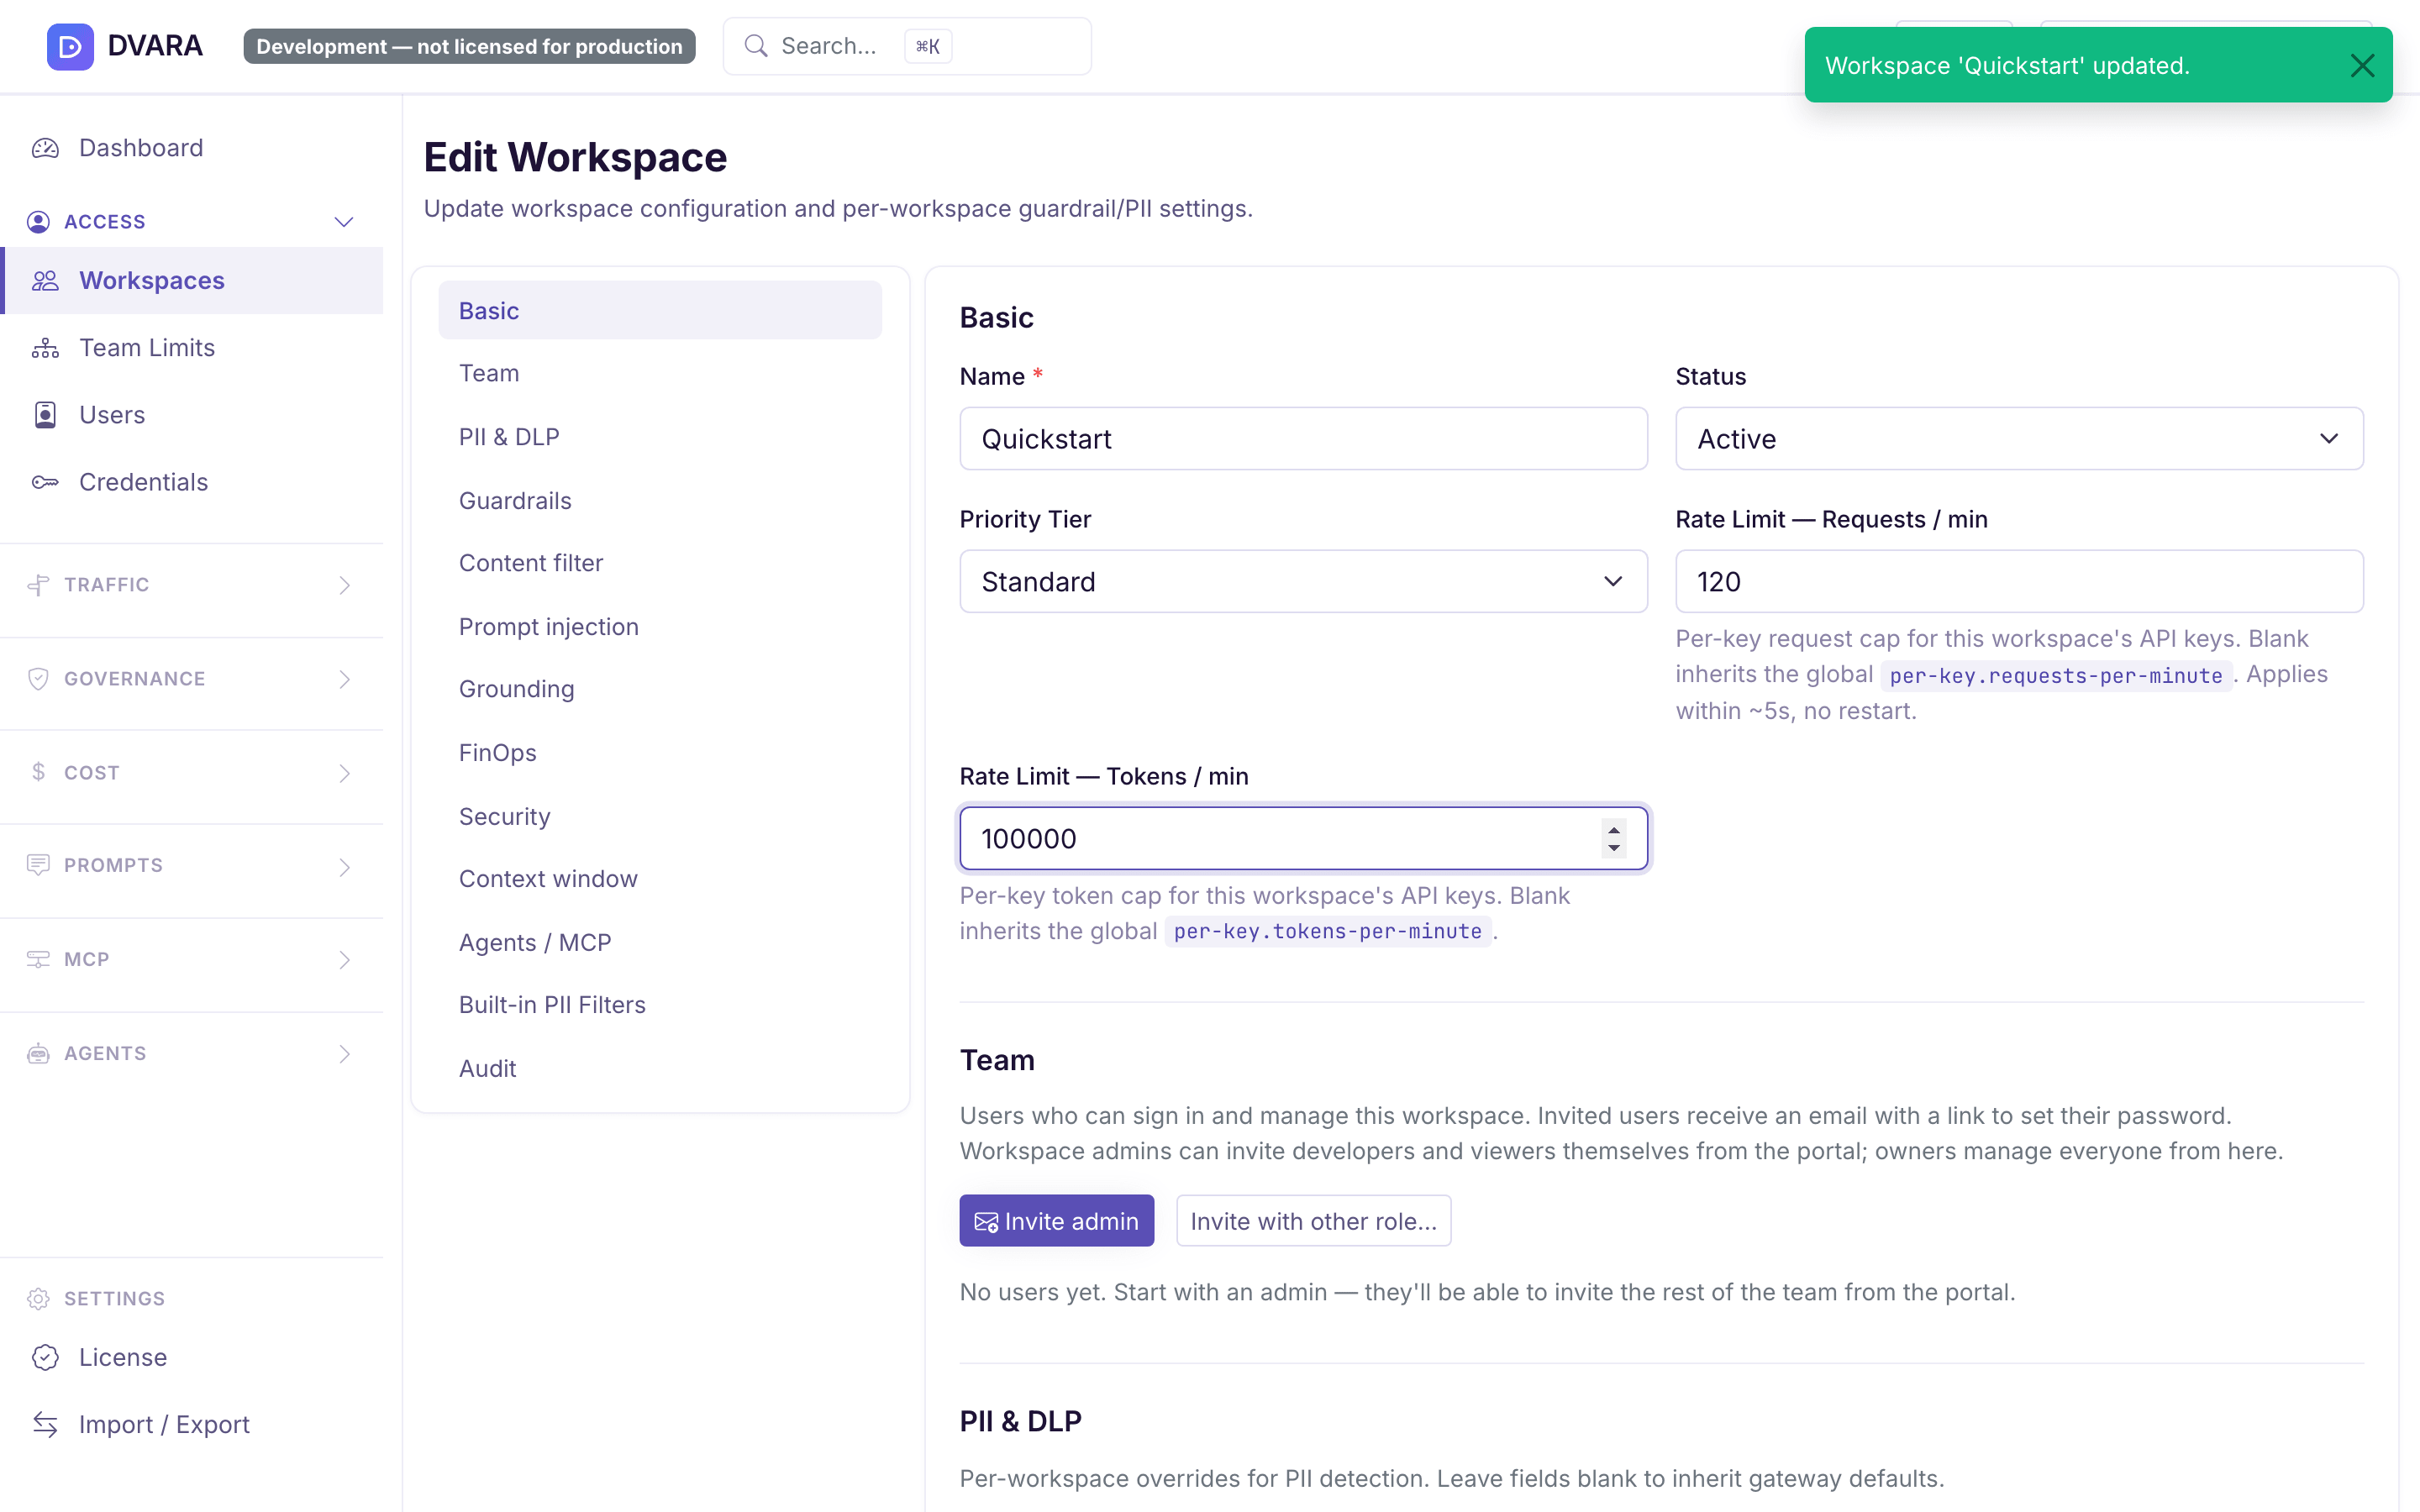
Each row shows the user's email (linked to their edit page), name, roles, and status (INVITED / ACTIVE / SUSPENDED). An INVITED user hasn't set their password yet — they're waiting to click the email link.
Step 3 — Send the invitation
Whichever path you took, you land on /users/new with the workspace ID and role already populated.
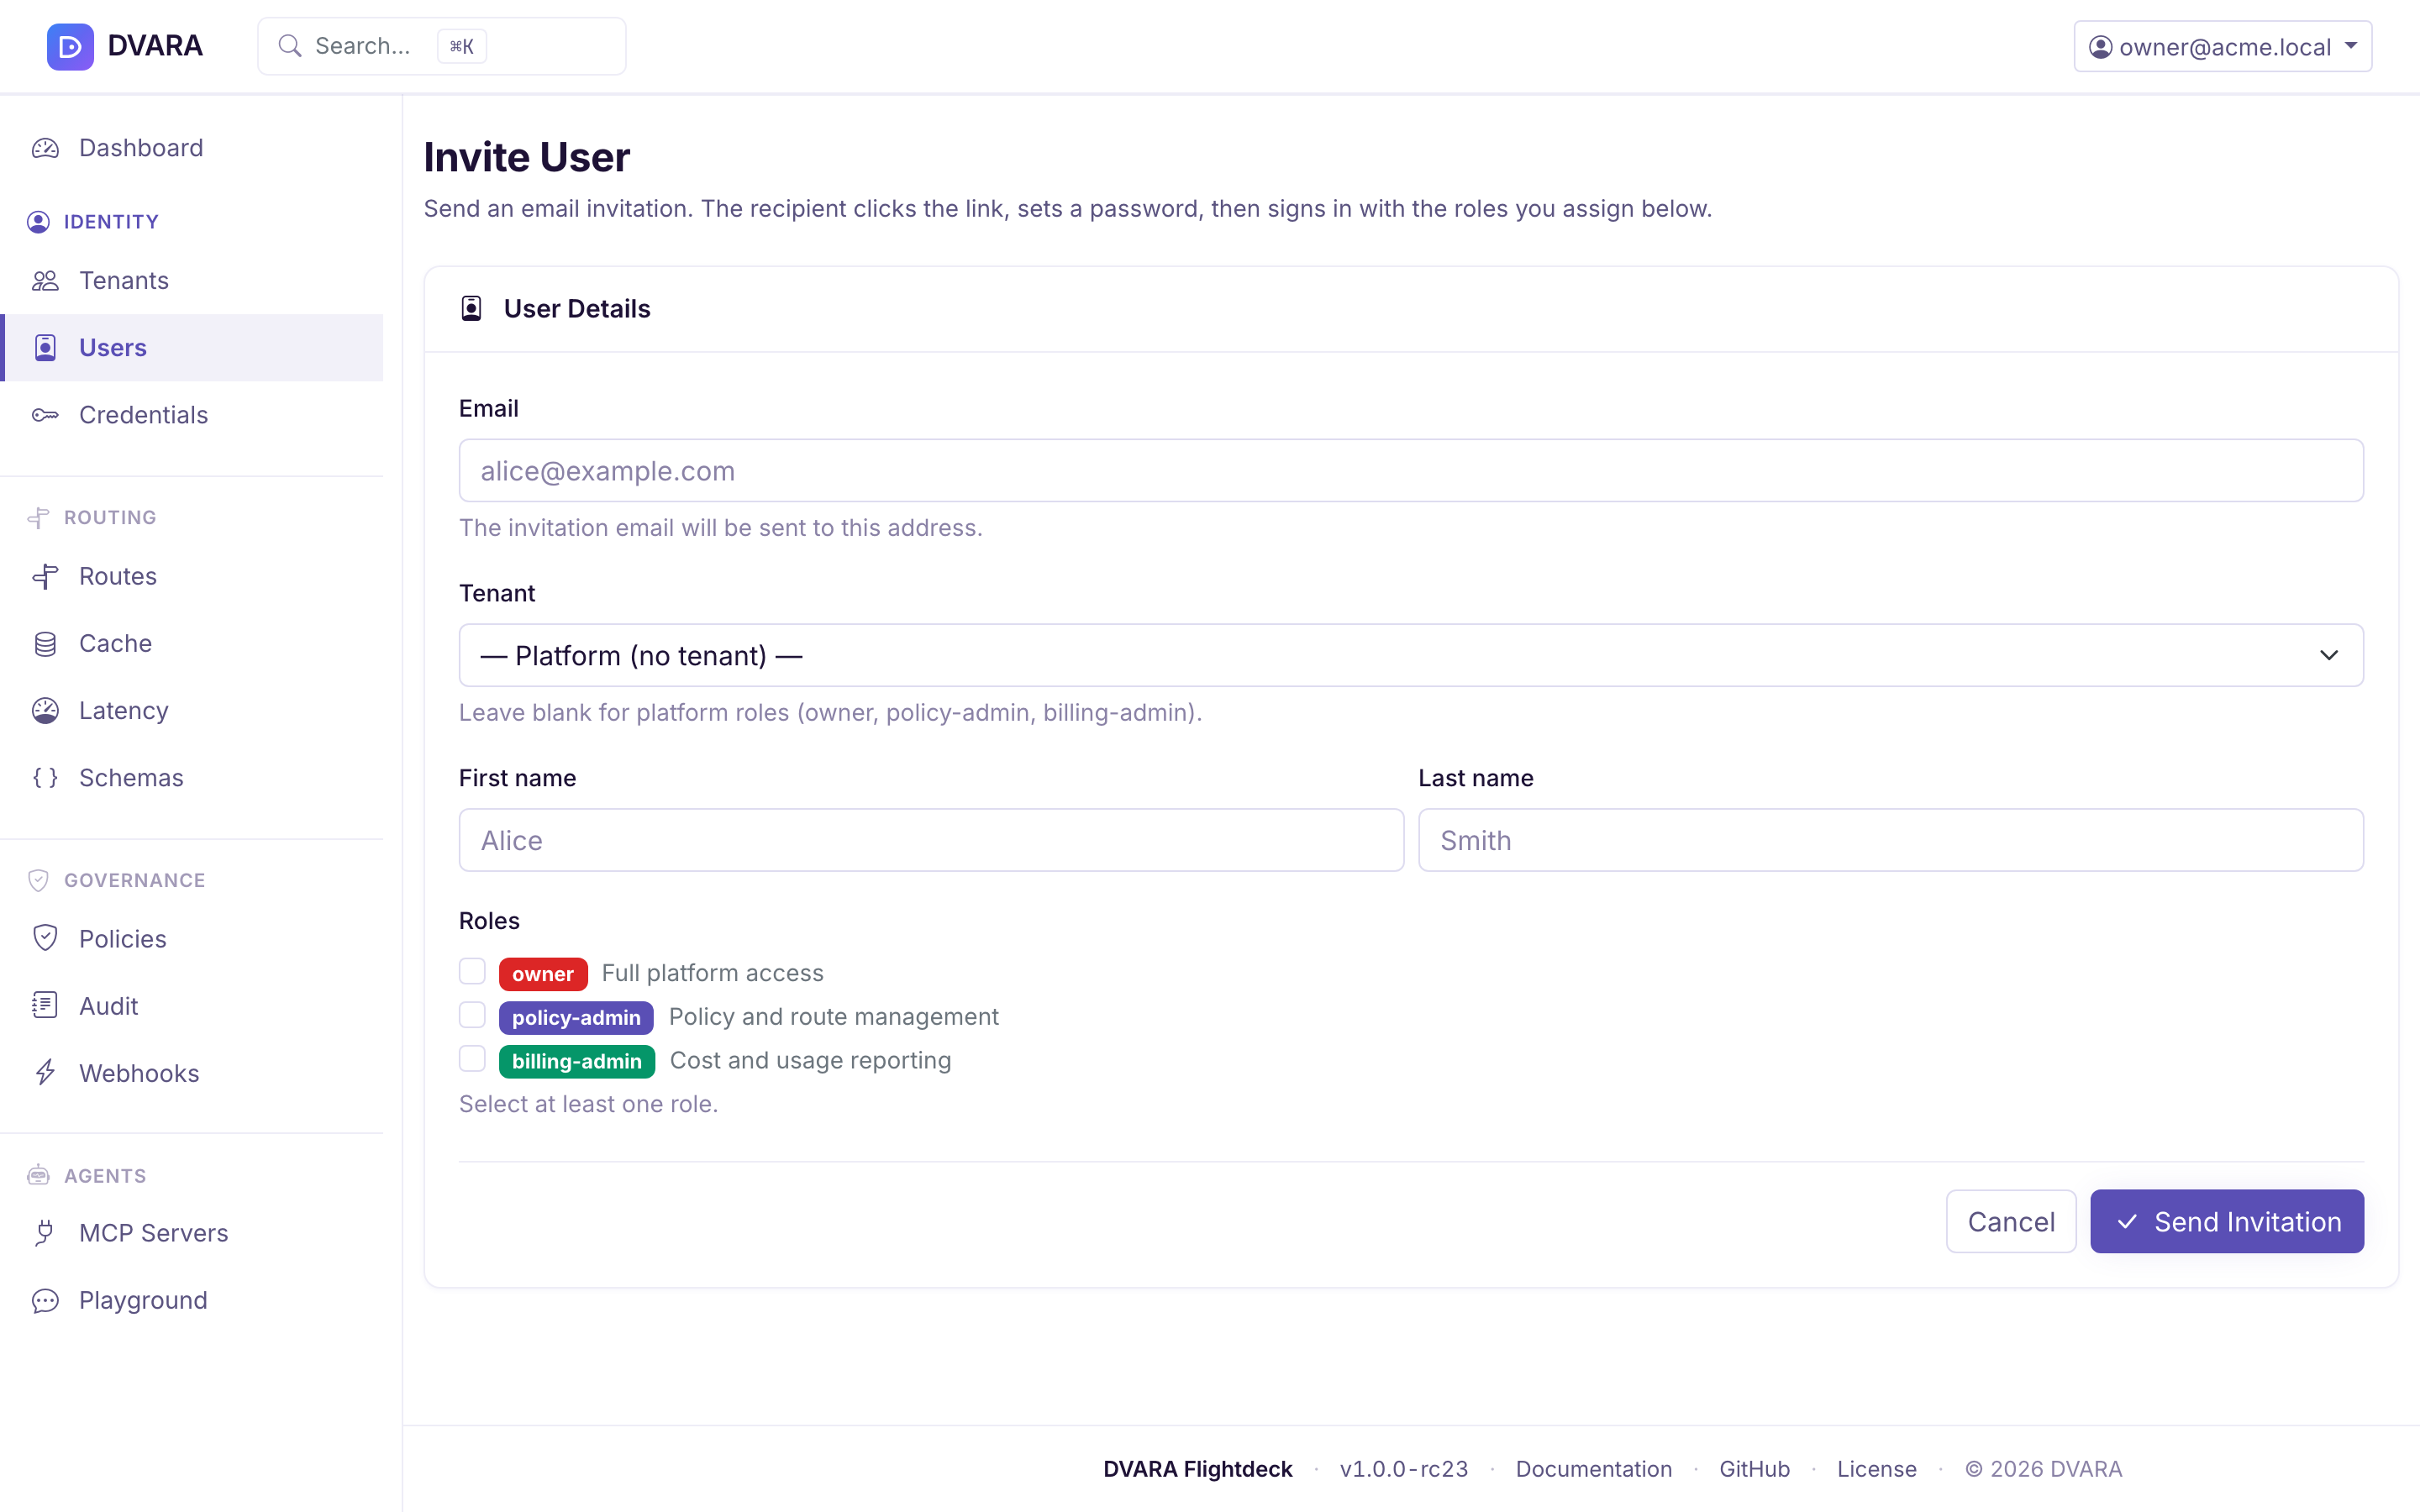
Fill in:
- Email — where the invitation will be sent.
- Name — optional display name.
- Roles — leave
adminchecked. You can assign multiple workspace roles but you cannot mix platform and workspace roles on one user.
Click Send Invitation. The server:
- Creates a
Userrecord withstatus=INVITEDand a 7-day verification token. - Renders the invitation email from a template and hands it to the configured transport (log or SMTP — see below).
Step 4 — Workspace admin accepts the invitation
The invitee receives an email with a Set your password link that points at /register?token=<uuid>. The token is single-use and expires in 7 days. When they open it:
- They're asked for a password (minimum length is enforced — see built-in auth config).
- On submit, the
Userflips fromINVITEDtoACTIVE, the token is cleared, and they're redirected to/login?registered=true. - They log in with their email and the password they just set.
Because admin is a workspace role, Flightdeck opens the workspace home page instead of platform-wide navigation.
Step 5 — Hand off to the workspace admin
The new admin sees a workspace-scoped dashboard with usage, cost, audit, API keys, provider credentials, and a Team page. From Team → Invite, they can invite developers and viewers without involving the platform owner.
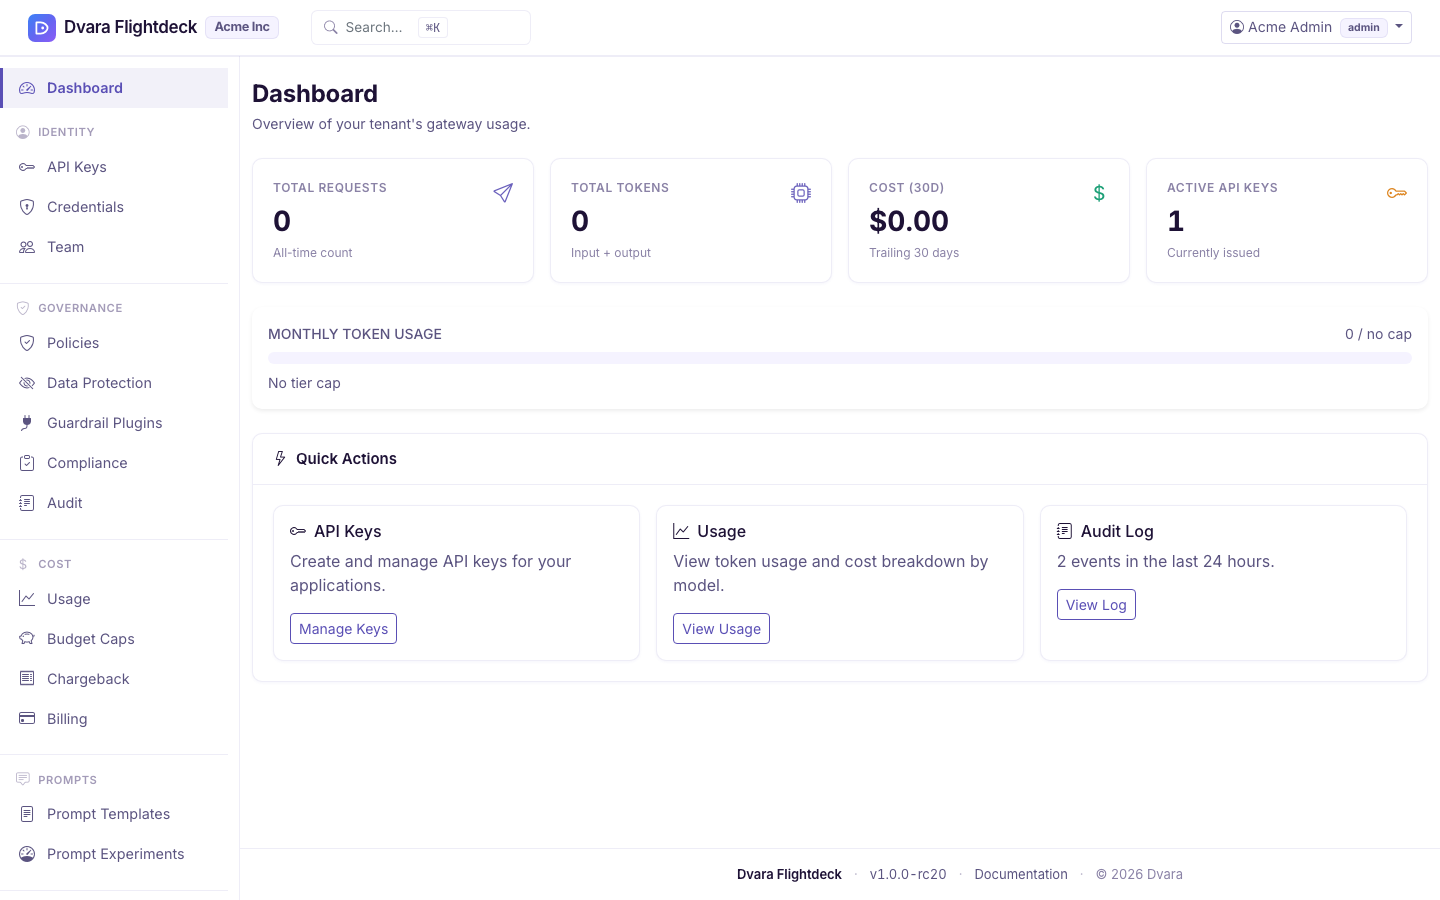
Scope limits the admin to their own workspace: they can only invite users whose role is admin, developer, or viewer, and every invitation they send is scoped to their workspace automatically.
From this point the platform owner is out of the loop unless they need to change role assignments, suspend the workspace, or manage platform-level resources.
Email delivery
The invitation email is built from a templated HTML body and delivered by one of three transports, configured with dvara.flightdeck.email.transport (env: DVARA_FLIGHTDECK_EMAIL_TRANSPORT):
log(default, for local and CI) — the entire email including the/register?token=…link is printed to the Flightdeck logs atINFO. Grep the log by the recipient address to find the token.smtp(production) — uses the standard SMTP properties (spring.mail.host,spring.mail.port,spring.mail.username,spring.mail.password). Setdvara.flightdeck.security.builtin.base-urlto the public Flightdeck URL — otherwise the link the user receives will point athttp://localhost:8090/register?token=…, which is exactly the kind of detail you discover only after a real user tries to click it.resend(production) — POSTs to the Resend transactional API. Setdvara.flightdeck.email.resend-api-key(re_…) and verify your sender domain in Resend, or use the sandbox senderonboarding@resend.devfor testing. Samebase-urlrequirement assmtpfor the link's host.
Token lifetime is seven days. Expired tokens render as invitation link is invalid or has expired on /register; there's no self-service resend yet, so the invite needs to be re-sent from /users/new.
Audit events
Onboarding shows up in the tamper-evident audit trail as:
| Event type | Emitted when | Payload highlights |
|---|---|---|
WORKSPACE_CREATED | A platform owner creates the workspace in step 1 | workspace_id, name, status, metadata, actor |
WORKSPACE_METADATA_UPDATED | Any subsequent edits to the workspace | workspace_id, actor, changes (diff per key) |
WORKSPACE_DELETED | The workspace is deleted | workspace_id, name, status, actor |
USER_INVITED | Step 3 succeeds — user persisted with status=INVITED and the invitation email delivered | user_id, email, workspace_id (null for platform-role invites), roles, status (INVITED), actor |
Token acceptance at /register (step 4) does not currently emit its own audit event. Creating and inviting users emits USER_CREATED and USER_INVITED; changing a user's role set in Flightdeck emits USER_ROLES_CHANGED.
OIDC and SAML deployments
If the Flightdeck is configured for OIDC (Enabling OIDC) or SAML, identity is owned by your IdP, not by DVARA, and this flow is slightly different:
- OIDC — users are not sent an invitation email. They exist in DVARA either by being created ahead of time via the Users page (invite-first mode) or by being auto-provisioned on first login from the JWT claims.
/registeris not used. - SAML — same shape as OIDC. With
dvara.flightdeck.security.saml.auto-provision=true, the user is created on first successful assertion usingdefaultRolesanddefaultTenantId. The former Automation API was removed in 1.7.0, so use the platform-wide or workspace-scoped Flightdeck views for account administration.
In both modes, the Team section on the workspace edit page and Flightdeck's workspace Team page still work for role assignments; only the email + password flow is skipped.
Troubleshooting
The CTA toast disappeared before I could click it. It stays up for seven seconds. If you missed it, open the workspace's edit page — the Team section has the same deep-link buttons.
The invitee clicked the link and got invitation link is invalid or has expired. Either the 7-day TTL has passed or the invite has already been consumed. Re-send from /users/new.
The invite email never arrived. Check the email transport. In log mode, the email is in the Flightdeck logs — grep for the recipient address. In smtp mode, verify dvara.flightdeck.email.from and the SMTP connection properties, and confirm the SMTP host is reachable from the Flightdeck pod.
The admin sees platform-wide navigation instead of the workspace home page. They have a platform role (owner, policy-admin, or billing-admin) instead of a workspace role. Edit the user and check the role assignments. Flightdeck rejects a mix of platform and workspace roles, but a user set to owner will still see platform-wide controls.